The Legend of Zelda Cold Run: Session 3
Wherein I drop a lucky bomb and discuss Zelda’s ‘fractal’ dungeon design
Since I am now mapping Hyrule by hand, I decided to spend a good portion of this session filling in empty spaces. As a result, I’ll do a little less screen-by-screen narration and try to focus on the major milestones.
I decide to head directly to dungeon 3 and exact my revenge on the Darknuts. Unfortunately, I enter the dungeon with a single heart (thanks to a few mistimed swipes at the animate statues posted outside). I proceed through most of the dungeon with ease, but once again succumb to the room filled with Darknuts. In the process, I pick up two new useful techniques: bombs are tricky to use, but they can often do damage to multiple Darknuts at once, so they work as an offensive tactic when you no longer have a throwable sword; also, if you keep a single block between Link and an enemy, his sword has adequate reach to damage the enemy while he stays protected. Cover-based swordplay? Take that, Gears of War.
My second attempt goes smoothly. I head directly to the boss, Manhandla, who spews a crazy amount of projectiles. To avoid the dangerous melee range, I drop a bomb near the center of the room and run. I luck out and manage to explode the boss with a single bomb.
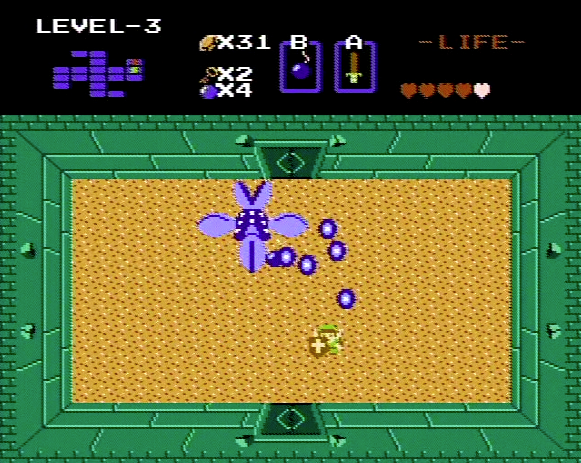
Once I grab my fresh heart container and Triforce fragment, I immediately head back inside to clear out the remainder of the dungeon. I net the raft and a nice clue from the old man, who asks, ‘Did you get the sword from the old man on top of the waterfall?’ No I did not. Nor do I know where the waterfall is. But thanks for the tip. To save backtracking time, I decide to sacrifice my remaining hearts and restart anew from the starting overworld screen.
I head roughly northwest for some map exploration and luck upon a small dock protruding from the lake shore. Sure enough, my new raft transports me to an uncharted island containing dungeon 4. I explore a few screens and notice a new twist: certain rooms are dark when you enter. Apparently the floor tiles have blocks in Link’s path because I am also unable to walk freely. I decide to cut my losses and exit the dungeon for further overworld exploration. Along the way, I intend to stop by the merchant and purchase the candle, in hopes that it will dispel the newfound darkness.
I resume heading northwest until I reach an uncrossable river that banks east. I follow the river in hopes of finding a route to return west, but ending up spotting a waterfall at its terminus. I recall from childhood strategy guides that Link can walk into the waterfall, so I do so, finding another old woman demanding payment for a clue. I oblige with the highest amount this time, hoping for a helpful tidbit. She replies: ‘Go up, up, the mountain ahead.’ Well, ma’am, I intend to in order to collect my sword.
The stairs beyond the waterfall lead to its source, along with the ubiquitous Zola and a new enemy, the blue Lynel. He takes a whopping six sword swipes to kill, so I make a mental note to avoid groups of Lynels. The cave to the upper left of the screen contains the sword of rumor, which I notice has an immediate effect on my damage output: the Zola is now killable!
I now murder every one I come across.
With my improved sword and shield, I now feel that the game’s balance has swayed in my favor. I don’t say this offhand; there is a palpable sense of progression at this point. I feel less fragile as I explore. I feel less antsy about large swarms of enemies. In a tabletop RPG, this would be the point where I accrue enough XP to level up, buy new equipment, and generally become more badass. In this respect, Zelda’s learning curve is smooth and balanced. You start out frail and swordless, with no money or inventory, but you slowly accumulate the gear necessary to continue. And there are no severe penalties for dying. In the overworld, you lose your map position; in dungeons, you’re reset to the entrance, but you maintain your stock of keys and any mapping progress you’ve made. Link’s four-way swing has a bit of fidgety quirk to it, especially against enemies who travel in diagonals, but auxiliary defenses like the boomerang keep combat tight and tactical. Notice that most items serve dual purposes: the bomb does area damage and opens secret passages, the boomerang stuns enemies and grab unreachable items, and so on. Zelda provides the player with a great number of options despite its limited palette.
I spend more time exploring and collecting rubies. I head south, then east once I hit the shoreline. I notice that I’ve reached the southern boundary of the map, so I continue east until the shore hooks north again. I pass a tantalizing heart container stranded on a seaborne plank and make a note to return when I have the appropriate upgrade (a boomerang won’t snag it). Another example of smart design: provide contextual clues to the player’s future capabilities and reward exploration with both immediate and eventual rewards.
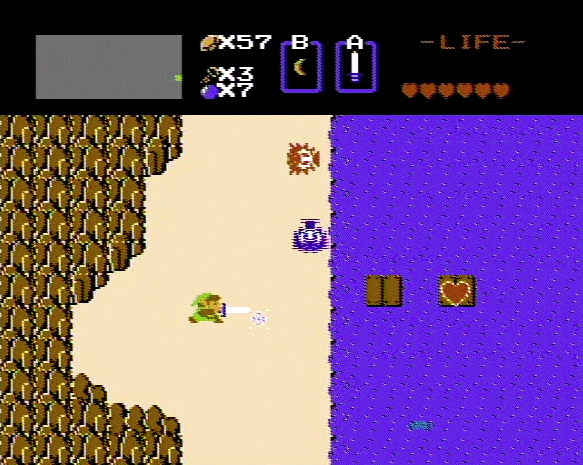
Further north, I reach another wooden dock. Link sails ahead to a new island, surrounded in an unfamiliar white edifice, and I think I’ve discovered another dungeon. Not so. The entrance leads to an old man with a generous choice: red potion or heart container? Since the latter is a permanent upgrade, while the former is a limited resource, I opt for the heart.
Further overworld map exploration nets me enough rubies for the blue candle, so I stop by a merchant and purchase my prize. Now adequately equipped for darkness, I proceed back to dungeon 4.
My hunch about the candle proves correct. I can now see that the darkened rooms are patterned with Tetris-esque configurations of floor tiles that make blind navigation exceptionally difficult. I also notice that some rooms contain unpassable blue tiles, presumably indicating water. Some of these waterways split the room into halves, which prove to be clever foreshadowing of the dungeon item ahead.
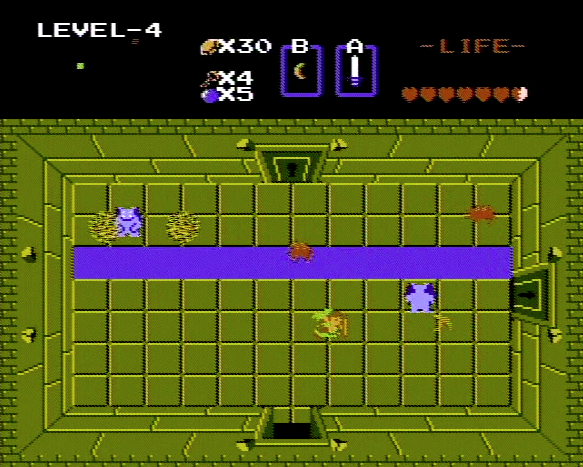
In retrospect, the first three dungeons served the purpose of introducing the basics: shuttered doors, item retrieval, secret passages, hidden stairways, etc. Beyond a few scattered secrets, the layouts are fairly straightforward. But dungeon 4 is the first to showcase a kind of ‘fractal’ design that would later become the hallmark (perhaps the cliche) of the Zelda franchise. In short, the dungeon is impassable without locating an item located within that dungeon.
In an eastern room, I shove a block aside to reveal a hidden staircase. Stowed within is the ladder, an item that, once again, serves two purposes. And thanks to some thoughtful dungeon design, I am immediately taught both purposes without the need to consult the manual or have a pop-up window explain them to me. As soon as I exit the screen where I find the ladder, I enter a room with maze-like tiles arranged above a watery expanse. Most of the walkway is the same width as Link, so you inevitably bump against the edges as you navigate. Doing so triggers the ladder above an adjacent water tile, permitting Link to walk quickly across previously impassable terrain. That’s lesson one.
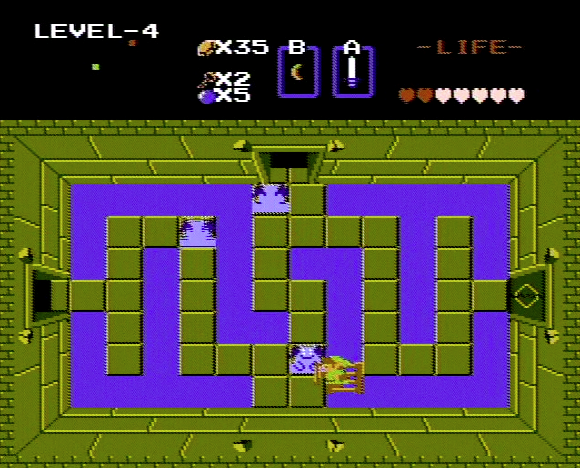
The room’s enemies teach lesson two. Like Link, the bouncing Vire are restricted to solid tiles—without their own ladder, they’re landlocked. With careful positioning, Link can perch on the ladder just out of the Vire’s reach. However, once hit, the Vire release red Keese, who are able to fly above the water. The ladder no longer provides safety when enemies are airborne.
The room immediately north instructs the player about another ladder limitation. Here, water surrounds a peninsula of walkable tiles, stranding Link from the western doorway and the map item tucked in the lower right corner. Walking to the edge of the peninsula reveals that the ladder can only stretch a single tile in any direction. The shortest stretch of water is two tiles long, so Link must find another route.
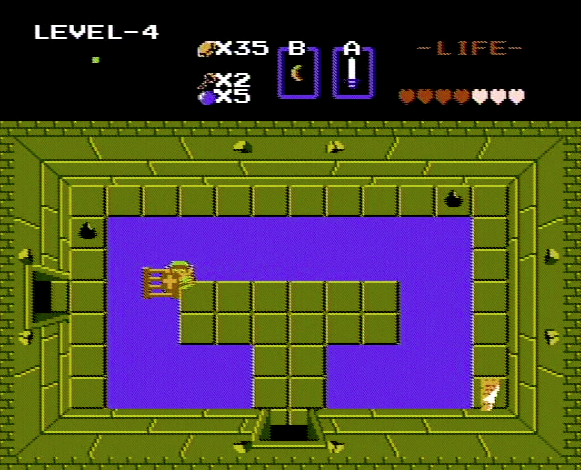
Equipped with the ladder, the earlier impassable rooms now make sense. By teaching through design rather than text, the player is allowed to have their own ‘a-ha!’ moments when they discover an item’s uses. Furthermore, without overt explanation, the player is more willing to experiment. What else might the ladder do? The lessons learned in the dungeon ripple outward to the rest of the world. If the ladder can cross indoor waterways, might it also be possible to cross rivers outdoors?
I ladder-walk with aplomb toward the exit, narrowly escaping a Manhandla battle with no bombs and a single heart. Flush with bravado, I decide not to light my candle in the next room and end up dying alone, in darkness, surrounded by bats. Session end.
STATS
Death count: 7
Triforce count: 3
Session time: 00:37
Total play time: 01:17