The Legend of Zelda Cold Run: Session 8
Wherein I master using it
Last time, I picked up the blue ring, but I still don’t feel ready to face the Wizzrobes again. With bait in hand, I decide to skip ahead to Level-7. The green dungeon proves far simpler than Level-6. The rooms are filled primarily with boomerang folk and sword-toting skeletons. Along the way, I recover the red candle, which apparently is the ‘unlimited’ upgrade of the blue candle.
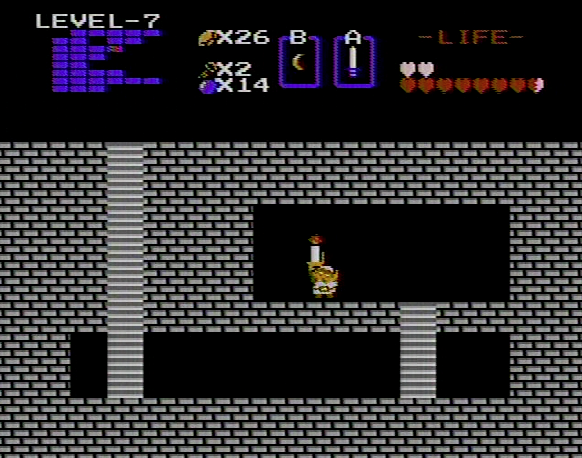
Instead of a single illuminating discharge per room, Link can now wield the candle as an offensive tool. Compared to the sword, candle flame is weak, but its short range of travel and decent duration make it a nice secondary item for crowd control. For slower enemies, the candle can ‘roll’ through them for multiple hits. Bats and mini-slimes die in a single flame, often in multiples.
The dungeon also contains an interesting nod to Super Mario Bros.. For those who don’t know, Miyamoto’s core team worked on SMB and Zelda concurrently. The former would be the pinnacle of the Famicom cartridge’s stock hardware, inaugurating a new era in console platformers, while the latter would launch with the Famicom Disk System and set the bar for fantasy action/adventure games. Not too bad for a team of roughly six designers, programmers, and composers. As a result, the games share many affinities, from enemy names (Great Demon King Koopa/Ganon), to spatial puzzles, to brick patterns. The rotating firebars in Mario’s castle levels? Those were originally meant for Zelda. So Level-7 contains a weird treasure room that is immediately reminiscent of Mario’s underground coin rooms.
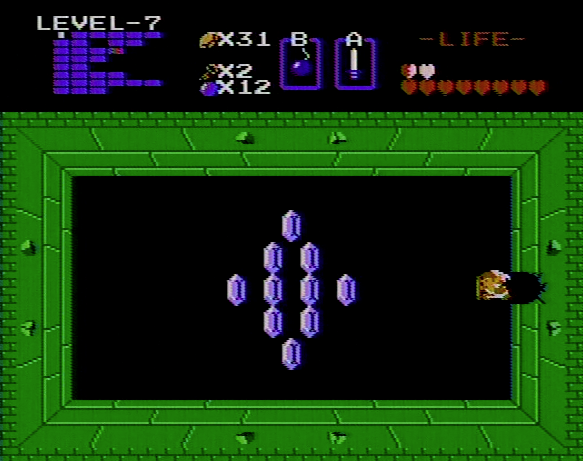
Whether the team included this consciously or not (my bet is yes), it’s a clear nod to Zelda’s cartridge sibling.
The only tricky bit of Level-7 is the room with the wall grabbers. A partial rectangle of blocks line the room’s edges. While I attempt to push them, Wisps track along the sides, bumping me perilously toward the hands. The first time I reach the room, I am knocked into a grabber and dragged back to the dungeon’s starting room. Though it takes five minutes to work my way back, on the second visit I manage to avoid the hands and find the secret staircase.
The boss turns out to be a rehash of Level-1’s unicorn dragon. I’m a half heart away from full, so I test my arrows. Three shots to the head bring Aquamentus down.
Invigorated by a well-earned heart container (and a fresh stock of blue potion), I return to Level-6. Inexplicably, I breeze through the dungeon, dispatching Gleeok and delving deeper than I have in any previous run. My energy depletes after a few more Wizzrobe rooms, but I drink the blue potion and find a second wind. The final boss is Gohma, a cyclopean crab whom I’m told despises arrows in his giant eye. Understandably so. Remarkably, it takes only a single arrow to send him to his Hyrulean afterlife and OMG could it be my Level-6 nightmare is finally over?!

Not quite. In my conquering ecstasy I notice that I failed to acquire an item. Zelda logic assures me that all dungeons contain an item. Consulting my map, I plunge back in and head for any unmapped rooms. A few moments later, I hold aloft the magic wand. I equip the wand and discover that I can now replicate the Wizzrobes’ offensive spells. However, it is not the crushing weapon I hope for—for one, it is useless against said Wizzrobes and, despite its range, feels underpowered at this late point in the game. I suppose it makes a decent long-range substitute when Link’s health is low, but otherwise it seems redundant.
Before I close the session, I make a final trip to the graveyard to see if I can pick up the master sword. Much to my surprise, I can. Wands be damned, this is a weapon. Session complete.
STATS
Death count: 25
Triforce count: 7
Session time: 01:00
Total play time: 04:57