I AM EXTRA: The Super C Helicopter Boss
How Konami’s developers used the MMC3 scanline counter to create large moving enemies.
The following section was originally intended to directly follow the Mega Man 2 Mecha Dragon discussion in the ‘Big Boss’ section of chapter 6. According to my notes, I began dissecting the Super C Area 1 boss fight on September 9, 2012, though I recall that it took me several days to understand how the scanline counter worked and translate that into readable prose. (I also planned to write a breakdown of the technically-impressive level 1 jet plane fight from KID/Taxan’s G. I. Joe, but I soon deemed it too similar to the Super C fight.)
This section remained in the final text until late in the book’s life, but I ultimately decided to cut the description because a) the ‘Big Boss’ section was already too long, b) the Mecha Dragon fight served a similar descriptive purpose, and c) I judged the scanline counter description to be far too technical and esoteric for the lay reader. Re-reading this section now, I think I made the right choice.
[…]
The complexity of onscreen effects continued to progress as the Famicom matured and Nintendo’s R&D3 added advanced capabilities to their mappers. The MMC3, in particular, was a watershed ASIC for the Famicom. In addition to substantial PRG-ROM and CHR-ROM capacity upgrades (up to 512 and 256KB respectively), both bankable in 8KB pages, MMC3 added one of the Famicom’s most sorely lacked features: a scanline counter. The sprite 0 hit was a reliable workaround, but it both lacked the precision for complex raster effects and could only be used once per frame. In contrast, the MMC3 was precise within a handful of PPU cycles and could trigger an IRQ interrupt multiple times per frame. In concert, these features enabled a number of impressive graphical effects that were previously impossible.
Konami’s successor to Contra, Super C, used the scanline counter to scroll massive background-tile objects in four directions without affecting the terrain tiles at the bottom of the screen. At the conclusion of Area 1, the fiery sunset that patterns the sky throughout the level gives way to the telltale black background that indicates an impending boss battle. However, the ground has its own distinct terrain—metallic panels cut through the middle with a trench—rather than a simple banded pattern. Once the scroll locks in place, a massive turreted helicopter hovers into frame from the left edge of the screen. As the player battles the helicopter, it continues its descent, swooping low toward the right side of the screen, eventually opening a rear bay to allow enemy combatants to stream out. It is an impressive display by Famicom standards, a testament to Konami’s developers wringing new tricks from a seven year-old console.
The programmers mobilized the helicopter using the same technique that animates Mecha Dragon and Guts Dozer, but the MMC3 also allows the upper portion of the screen to scroll without affecting the ground level. The MMC3 scanline counter uses a clever bit of engineering to time its count properly. A single PPU address bus, A12, signals a predictable variation in the PPU’s rendering routine. Each scanline, the PPU spends its first 256 cycles—or ‘dots’—fetching name table and background pattern tiles. It switches gears for 64 dots, fetching sprite tiles (even if there are none on the current scanline), then spends its remaining 16 dots completing the name table and background fetches. At each transition, A12 oscillates between low (background) or high (sprites) signal states.1 Since the low to high transition (called a ‘rising edge’) occurs only once per scanline, the counter tallies one tick every time that event occurs.
The scanline counter functions continuously regardless of whether the programmer uses it or not. The only thing that stops its oscillation is a cessation of A12 high/low signals, i.e., turning off PPU rendering. There is also no means to directly poll the IRQ counter’s 8-bit value. Instead, the programmer has access to four hardware registers that offer indirect control. One must first load $C000 with the desired scanline count, request a counter reset by writing any value to $C001, then enable an IRQ by writing any value to address $E001. Once written, the counter will reset its internal count to the value loaded in $C000, then decrement that count by one each scanline until it reaches zero.2 $E000 manually disables the IRQ once the count is complete.3
By setting breakpoints on the four scanline registers in the FCEUX emulator debugger, we can see how Super C uses the counter to split the screen. During gameplay in Area 1, the value in RAM address $0045 is continually fed to $C000, while writes are made to both $C000 and $E000. In other words, the engine refreshes the counter each frame, but loads it with a dummy value ($FF) and leaves the IRQ disabled. In short, the screen split is prepped but not in effect until needed. Once the player reaches the boss area and its name table scrolls into place, RAM address $0045 is fed a new value ($A2, i.e., 162), which is then loaded into $C000. This sets the desired scanline count for the IRQ to fire.
The following two instructions immediately (1) request a counter reset and (2) enable the IRQ. When we view scanline 162 in FCEUX’s Name Table Viewer, we find that it falls just a few pixels above the grey border of the metallic terrain. If the helicopter survives long enough to track toward the bottom of the screen, it will eventually clip behind that invisible line, providing a visual clue to the mapper’s background processes. There is also a telltale glitch visible on the dividing scanline. In figure 6.17, there are a few stray pixels floating between the helicopter’s wheel and the bottom playfield, marking the location of the screen split.
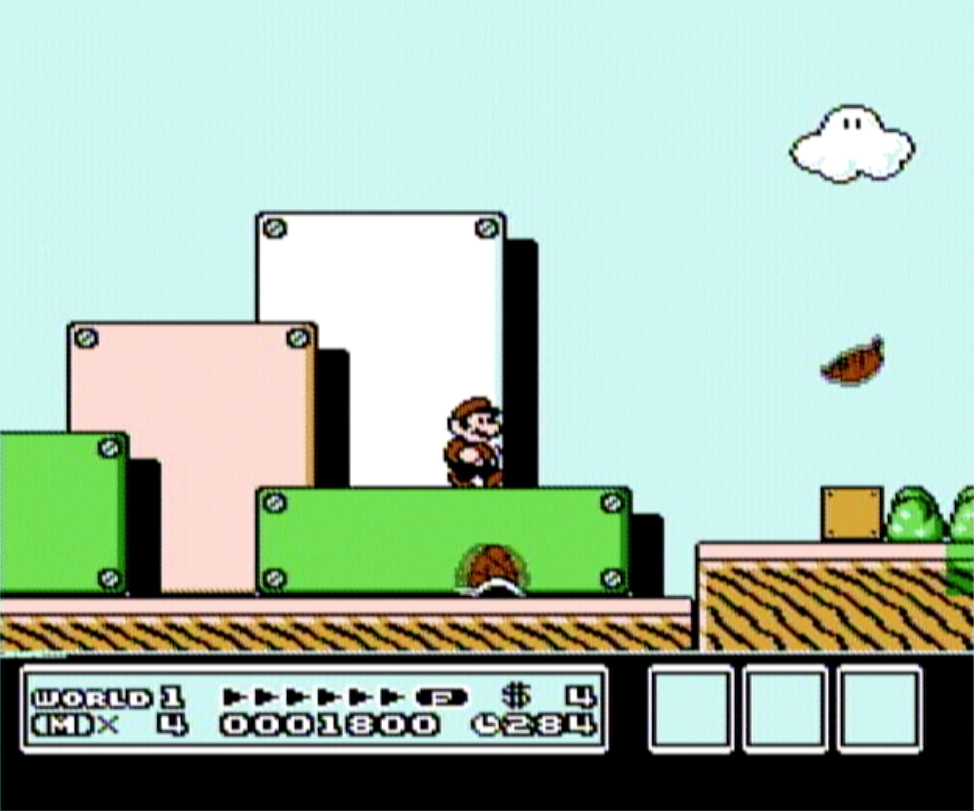
Such artifacts are attributable to improper IRQ timing. If the scroll reset does not occur during HBLANK, the PPU may render a few erroneous pixels along the scanline split. This is partly the fault of the MMC’s scanline counter implementation and partly the fault of the game’s programmers. Proper attention to timing can eliminate such errors, but like most glitches, they either weren’t caught or weren’t judged worth the expense to fix during the game’s hasty production schedule. And Konami was not the sole offender. Even Nintendo allowed an MMC glitch to surface in one of the best-selling titles of all time, Super Mario Bros. 3. Throughout the game, one can see a small flicker on the scanline dividing playfield from status bar, near the lower left edge of the screen (figure 6.18).
[…]
Sources:
[1] The high/low variation depends on whether the current fetched tile is located in pattern table 0 or 1. The text example assumes the ‘normal’ configuration: background tiles in 0 and sprites in 1. See ‘004’ in Disch, “NES Mapper List.”
[2] See ‘004’ in Disch, “NES Mapper List.”
[3] For more information on MMC3’s hardware registers, see NesDev Wiki, ‘MMC3.’
To read more I AM ERROR excerpts, check out I AM EXTRA.